9/10
ATV
INSTALLATIONMANUAL
FRONTANDREARMOUNTINGBRACKETKIT
KIMPEXN
o
374365
FORCOMMANDERTRACK SYSTEMANDKAWASAKI TERYX4VEHICLE
KIMPEX INC.
/ 5355, rue St-Roch /Drummondville (Québec) Canada / J2B6V4
KIMPEXUSA
/ 100Walnut Street /Champlain (NewYork) / 12919
2810461
•
A-2810461-EN-rev.a
•
LithographiéauCanada / Litho’d inCanada
9
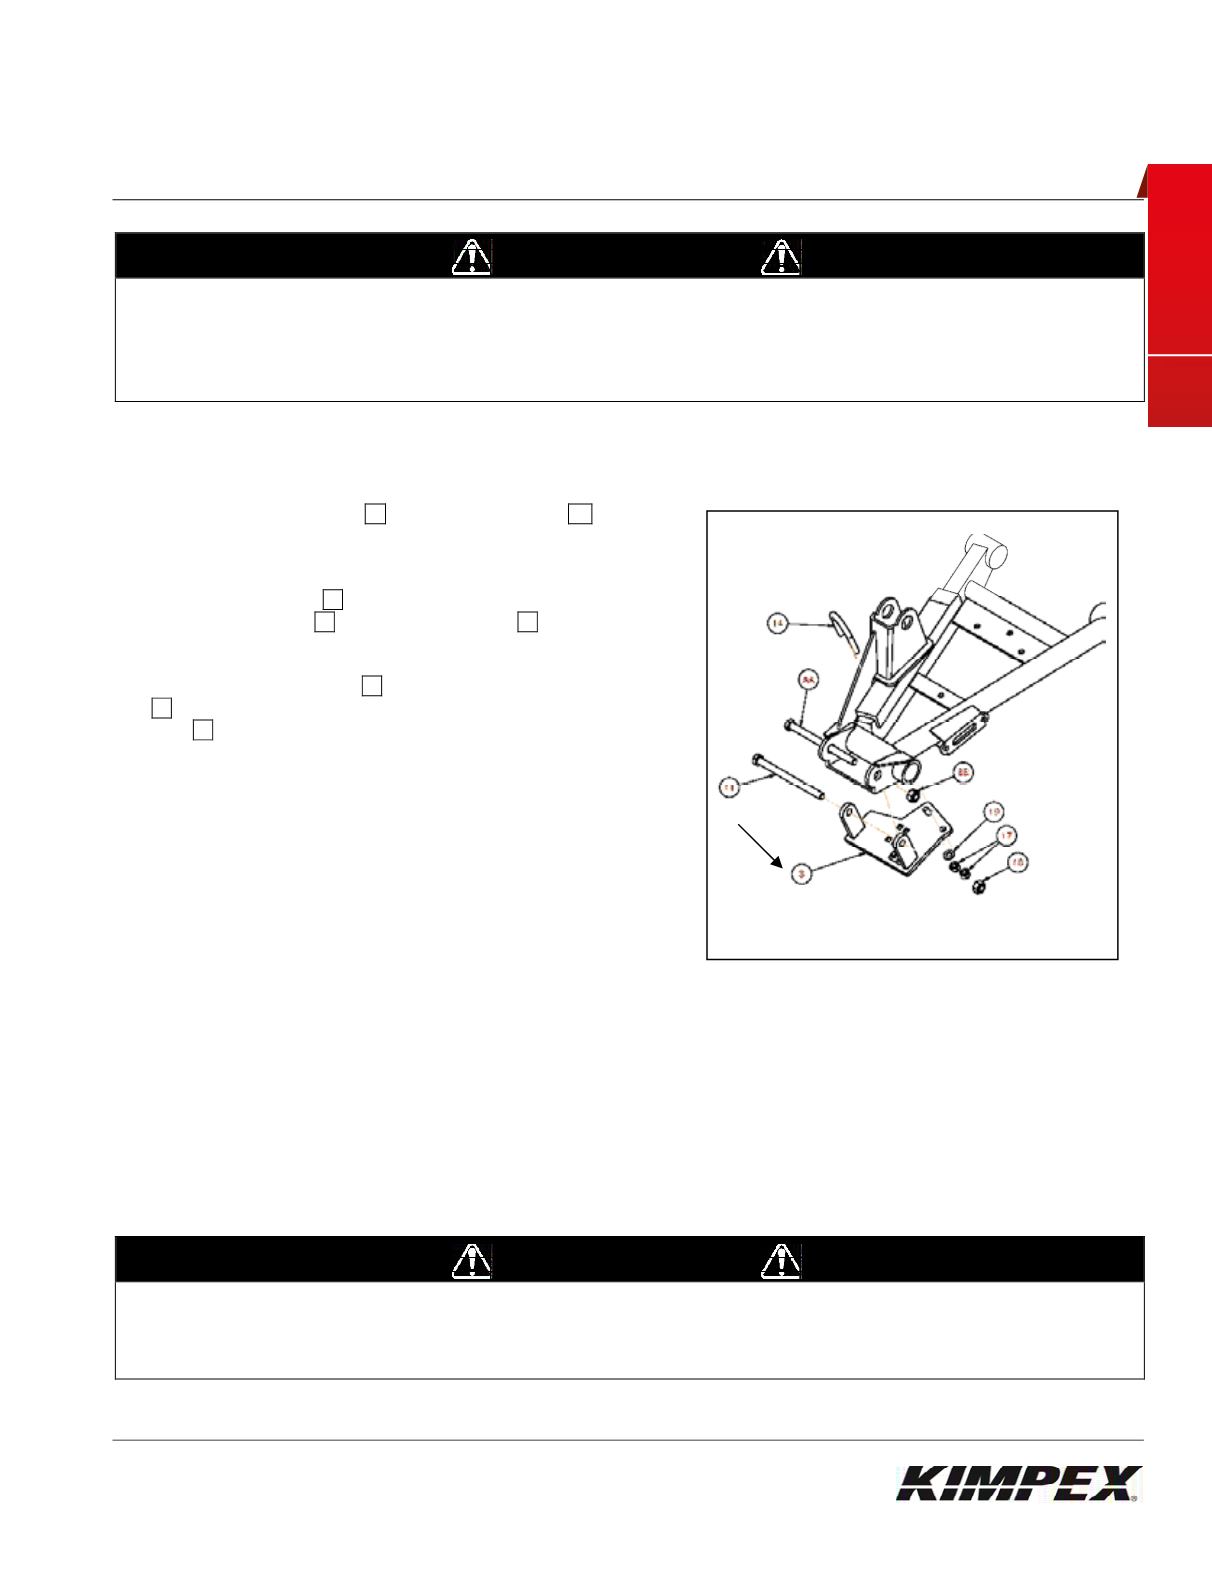
Rear suspensionbrackets installation
WARNING
1.
Thevehiclemust be
immobilized
and the
engine turnedoff
andcooled.
2.
Alwayswear
safetyglasses
during installation, adjustment or repair.
3.
Please readandensure you
haveunderstood thewarnings
andguidelines.
4.
Make sure the vehicle is
safelysecured inplace
bya systemdedicated to this use (jack stands andhoist) and that it is supportedor
fixedon locations that arenot likely tobreak, bendor slip. Ahydraulic jack is not safe; nor is a log. The vehiclemust benot able tomove.
The installation requires that the vehicle is in two-wheel drivemodewith thegearbox inneutral. After lifting the vehicle
and removing thewheels:
1) Remove theoriginal nut
BB
and theoriginal bolt
AA
. Keep
them for a later reinstallation.
Figure9.
2) Put the rear bracket
03
inplaceand secure it using the screw
M10-1.5 x130mm
11
and thenutM10-1.5
18
.
Figure9.
3) Position the rear "U" bolt
14
and secure it using the flatwasher
19
(place thewasher on the sideof the slot) and the two (2)
nuts
17
.
Figure9
4) Tightenall nuts inplace.
WARNING
1.
Do
not overtorque
thebolts
. Somepartsmaybe subject todeformations. If thebolts are too tight, safetyaspects couldbe compromised.
2.
Be careful: an incorrectlypositionedA-armbracket couldgive someplay,whichcouldmakedriving riskier aswell as lead tobreakage to
the vehicle, a loss of control and serious injuries.
Front of
TheUTV
Fig. 9


